Add a module to your tenant
This getting started guide will provide a Postman collection for you to make some example REST-like requests to your Digital Twin Registry tenant.
For authentication of your Postman application at your Digital Twin Registry client, we stick to OAuth and use the Client Credentials Grant type flow.
That means, you first need to set up a client with credentials, an ID and a client secret, that will then be used by your Postman application to get an access token at your Digital Twin Registry tenant.
To set up such a client, that is, to Create a module, use the Multitenant Access Control portal.
Log in to the Multitenant Access Control portal
Adding your tenant ID instead of <your-tenant-id>, log in to the Multitenant Access Control portal via the following link:
https://portal.bosch-nexeed.com/user-management/users?tenant=<your-tenant-id>
|
Tenant ID: At this point we assume that you have completed the steps at Request free access to an environment and already received a valid tenant ID as well as a user with full permission on this tenant.
About the Multitenant Access Control portal
The Multitenant Access Control portal is a separate user interface which you will only need to visit for:
-
Creating client access (for Postman)
-
For optional further management of users, roles, etc. (for example, to invite additional developers to your tenant)
Note that the Multitenant Access Control portal includes some configurations for the Nexeed Industrial Application system. However, in the context of Bosch Semantic Stack, the only relevant section for you is the Access Management section.
In case you need assistance, please address support.semantic-stack@bosch.com instead of the contact found in the Multitenant Access Control portal.
Users
The portal lists all users who are allowed to see the tenant.
Click on your user name to see the roles which have been granted to your user by default in the process of creating your tenant.
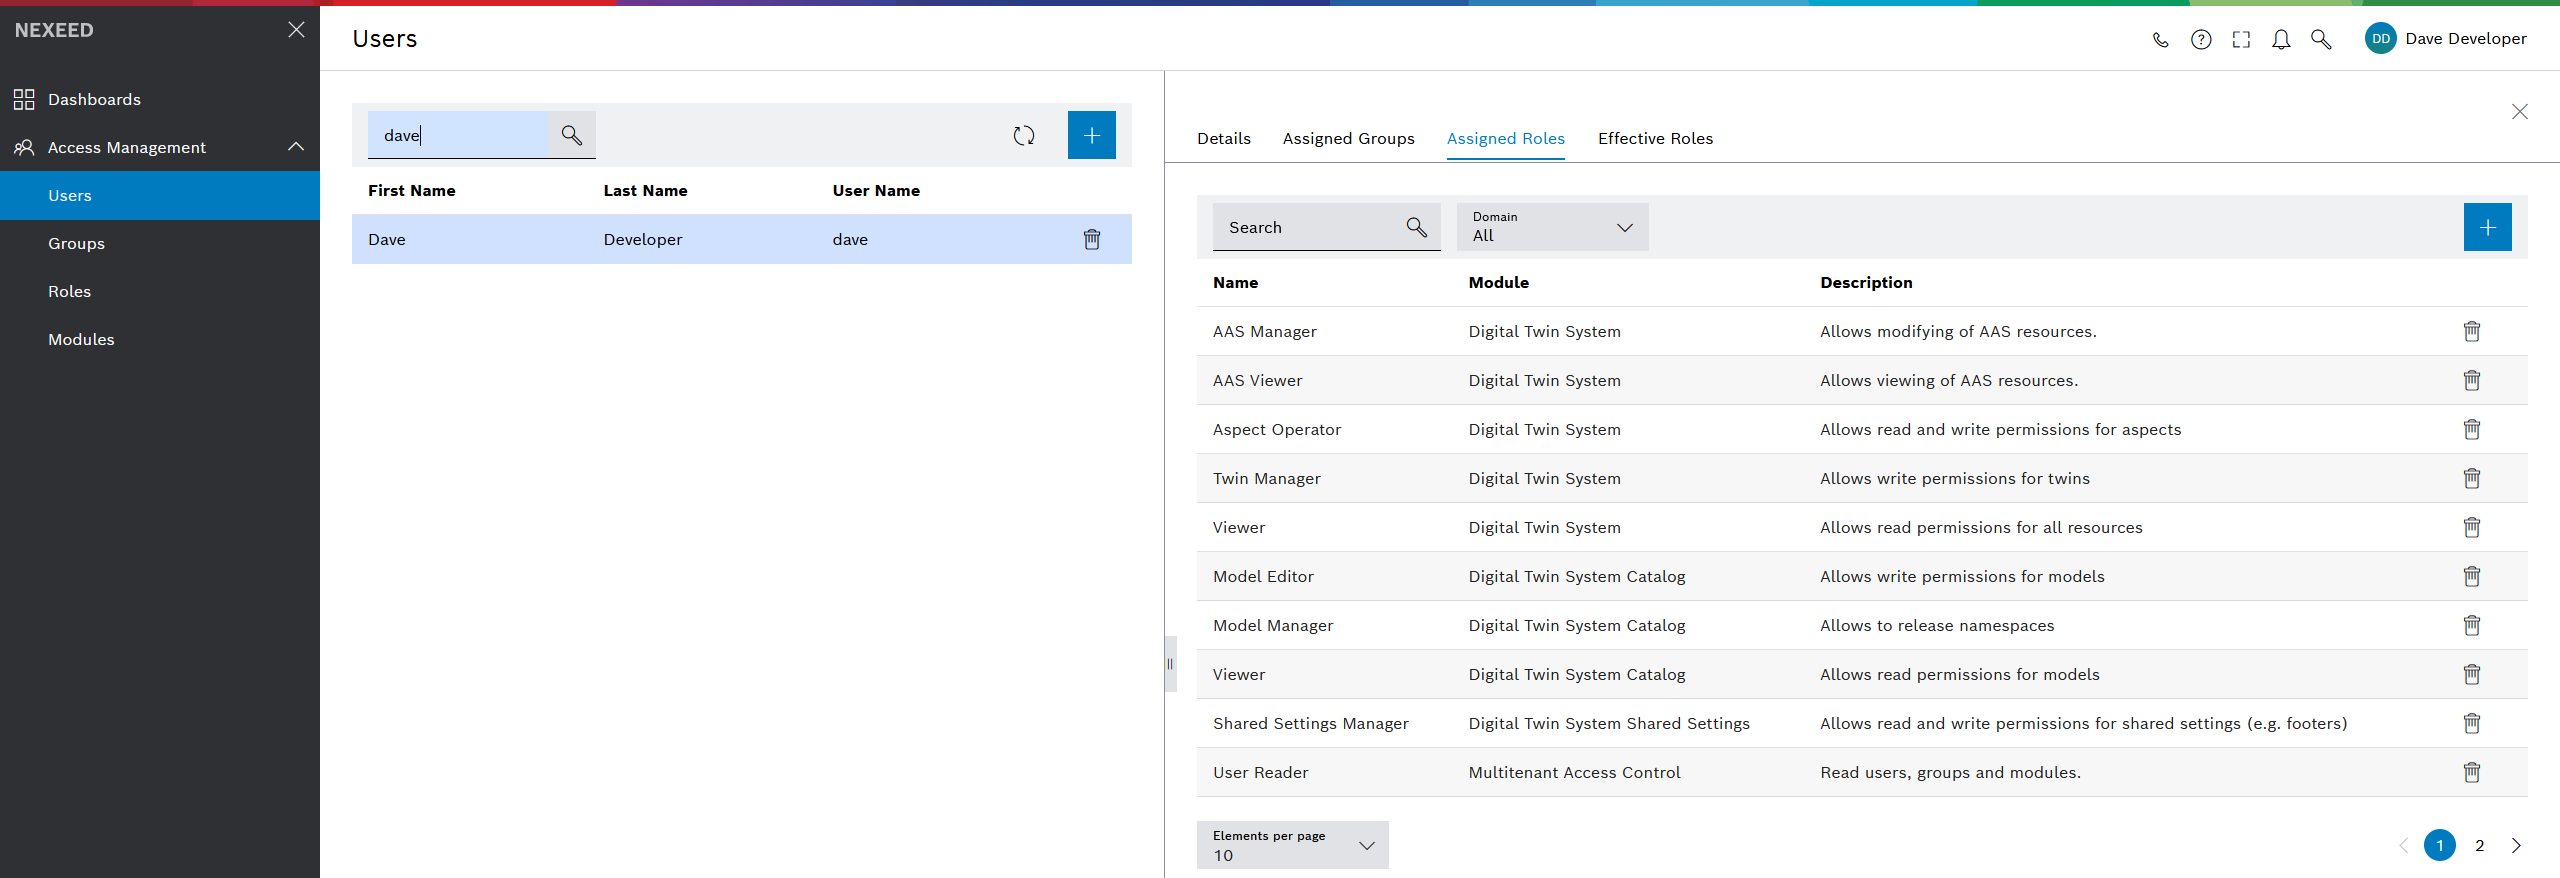
Roles
Roles can be assigned to users, groups, and modules. After authentication, the roles are resolved and grant you the permission respectively.
Find a detailed description of all roles at Concepts > Authorization.
Modules
The term "module" is just a generic title for all types of technical clients. So, all services which need access to your Digital Twin Registry tenant are regarded as modules.
As the admin of the tenant, you need to create such a module to enable Postman to query your Digital Twin Registry tenant.
Create a module
To set up a client so that an application such as Postman can access your Digital Twin Registry tenant, create a module in the Multitenant Access Control portal.
Prerequisite: You are logged in to the Multitenant Access Control portal. For further guidance, see Log in to the Multitenant Access Control portal.
-
Open the Modules page in the Multitenant Access Control portal.
-
Click the Add Module button
 .
. -
At the Details tab, fill the required fields and continue with Next.
-
Enter a name and a display name for your module.
Note:-
While the Module Name and Module Display Name can be identical, they must be unique on your tenant.
-
Should the module be needed for a UI, the Module Display Name is the one that will be shown in the UI.
-
Consider that — after having created the module — module names can still be edited.
-
-
Provide a client secret.
Note:-
While you define the client secret, the client ID gets generated automatically and will be displayed at the end of the dialog.
-
Consider that — after having created the module — the client secret can neither be displayed nor edited anymore.

-
-
-
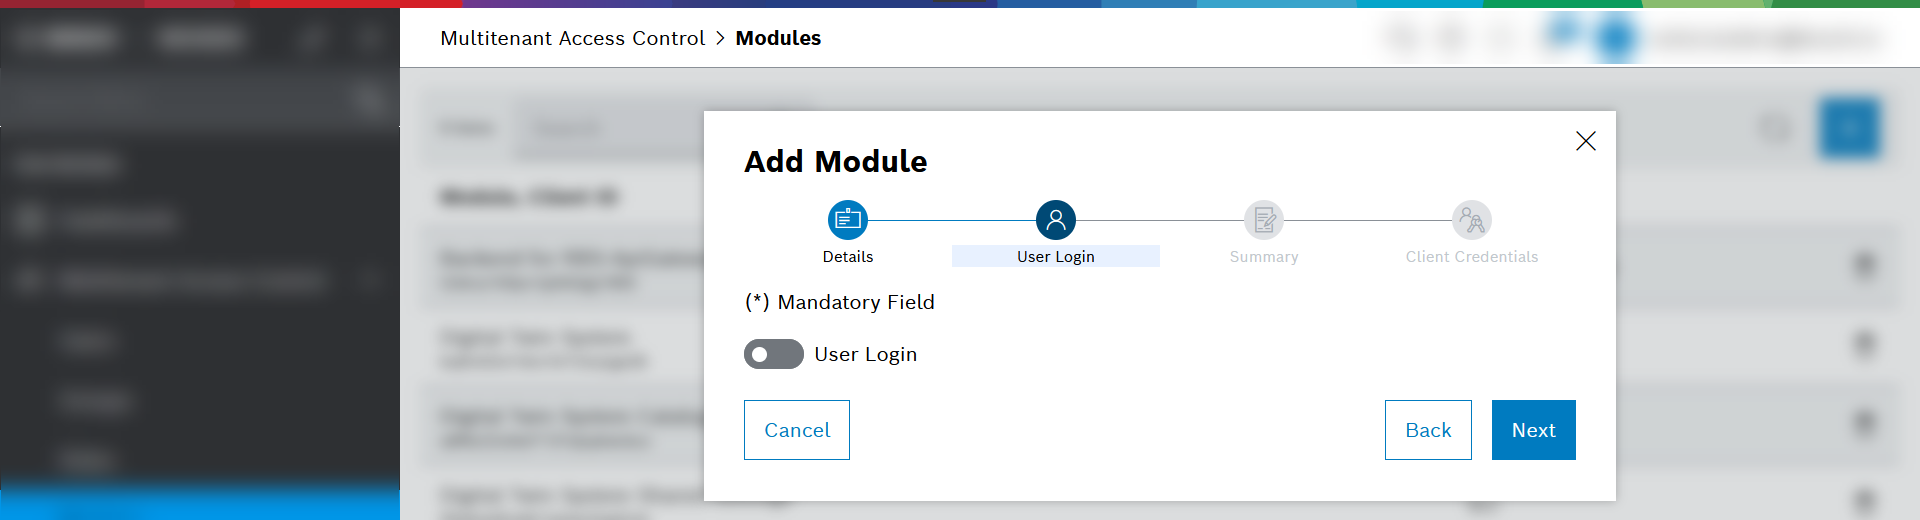
Disable the User Login options. Continue with Next.
Note:-
The User Login options are only needed if the credentials are being used for an UI, as the public URLS have to be defined.
-
Should you need those options for the module later — after having created the module — you can still add it then.
-
-
The Summary tab displays your configuration. If needed, you can go back and change your entries.

-
At the Summary tab, to create the module, continue with Save.
→ Result: The module and the client ID get created. -
At the Client Credentials tab, copy the Client ID and the Client Secret to your key storage application and handle with care.
The client secret will never be visible again. 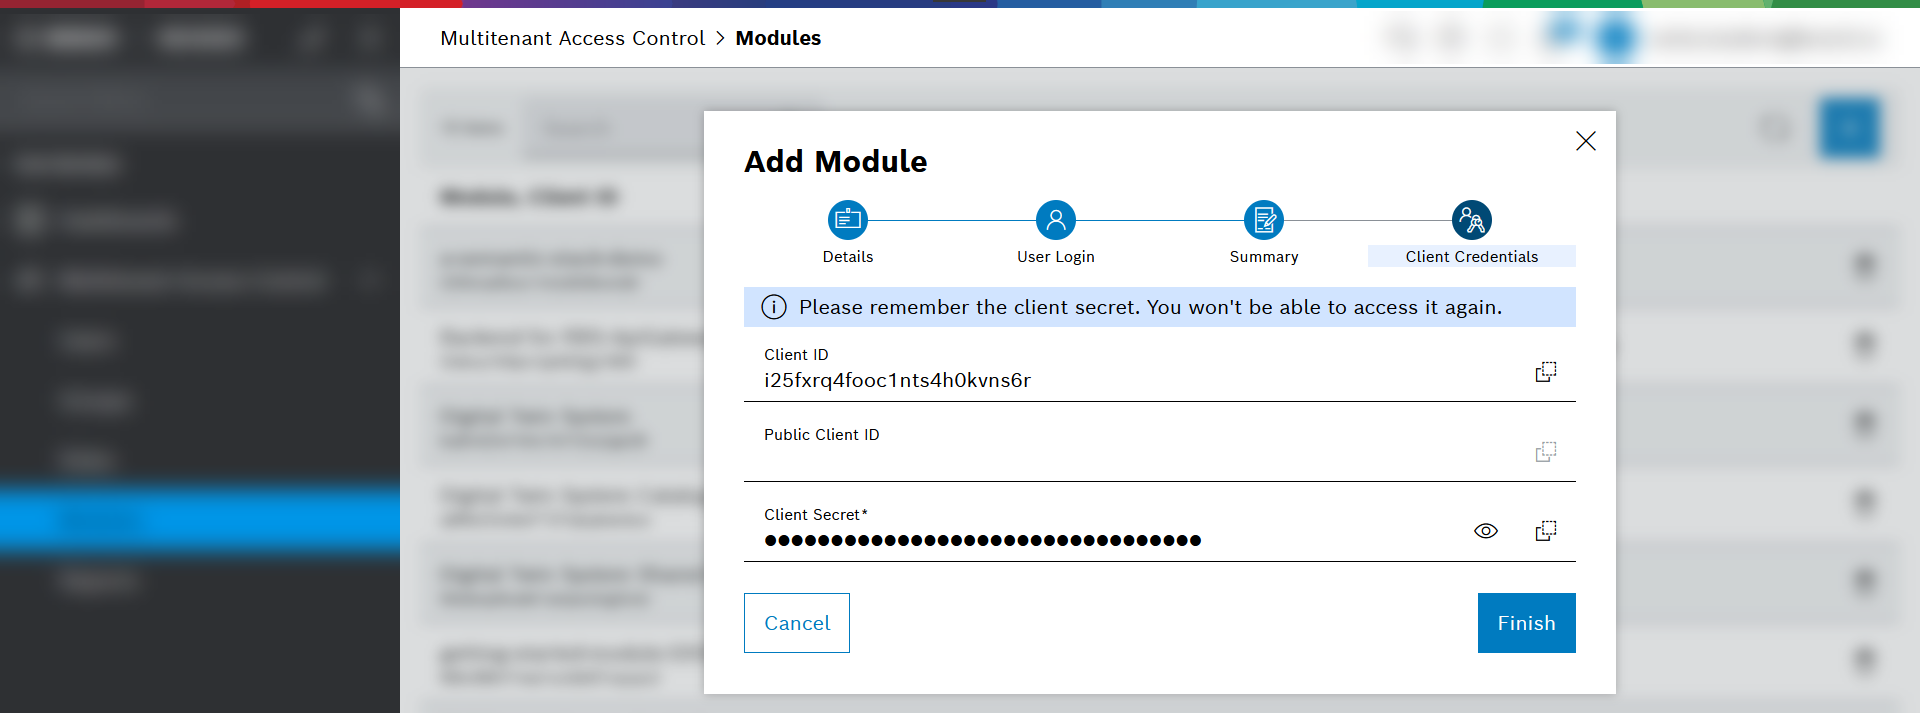
-
Click Finish to close the dialog.
You now have created a module. For this getting started guide, you will need the client credentials when setting up Postman to work with the provided Postman collections. The next step is to add roles to your module.
Add roles to your module
Prerequisite: You have already created a module as described in Create a module.
-
Click the new module you have just created.
The Details tab is displayed. -
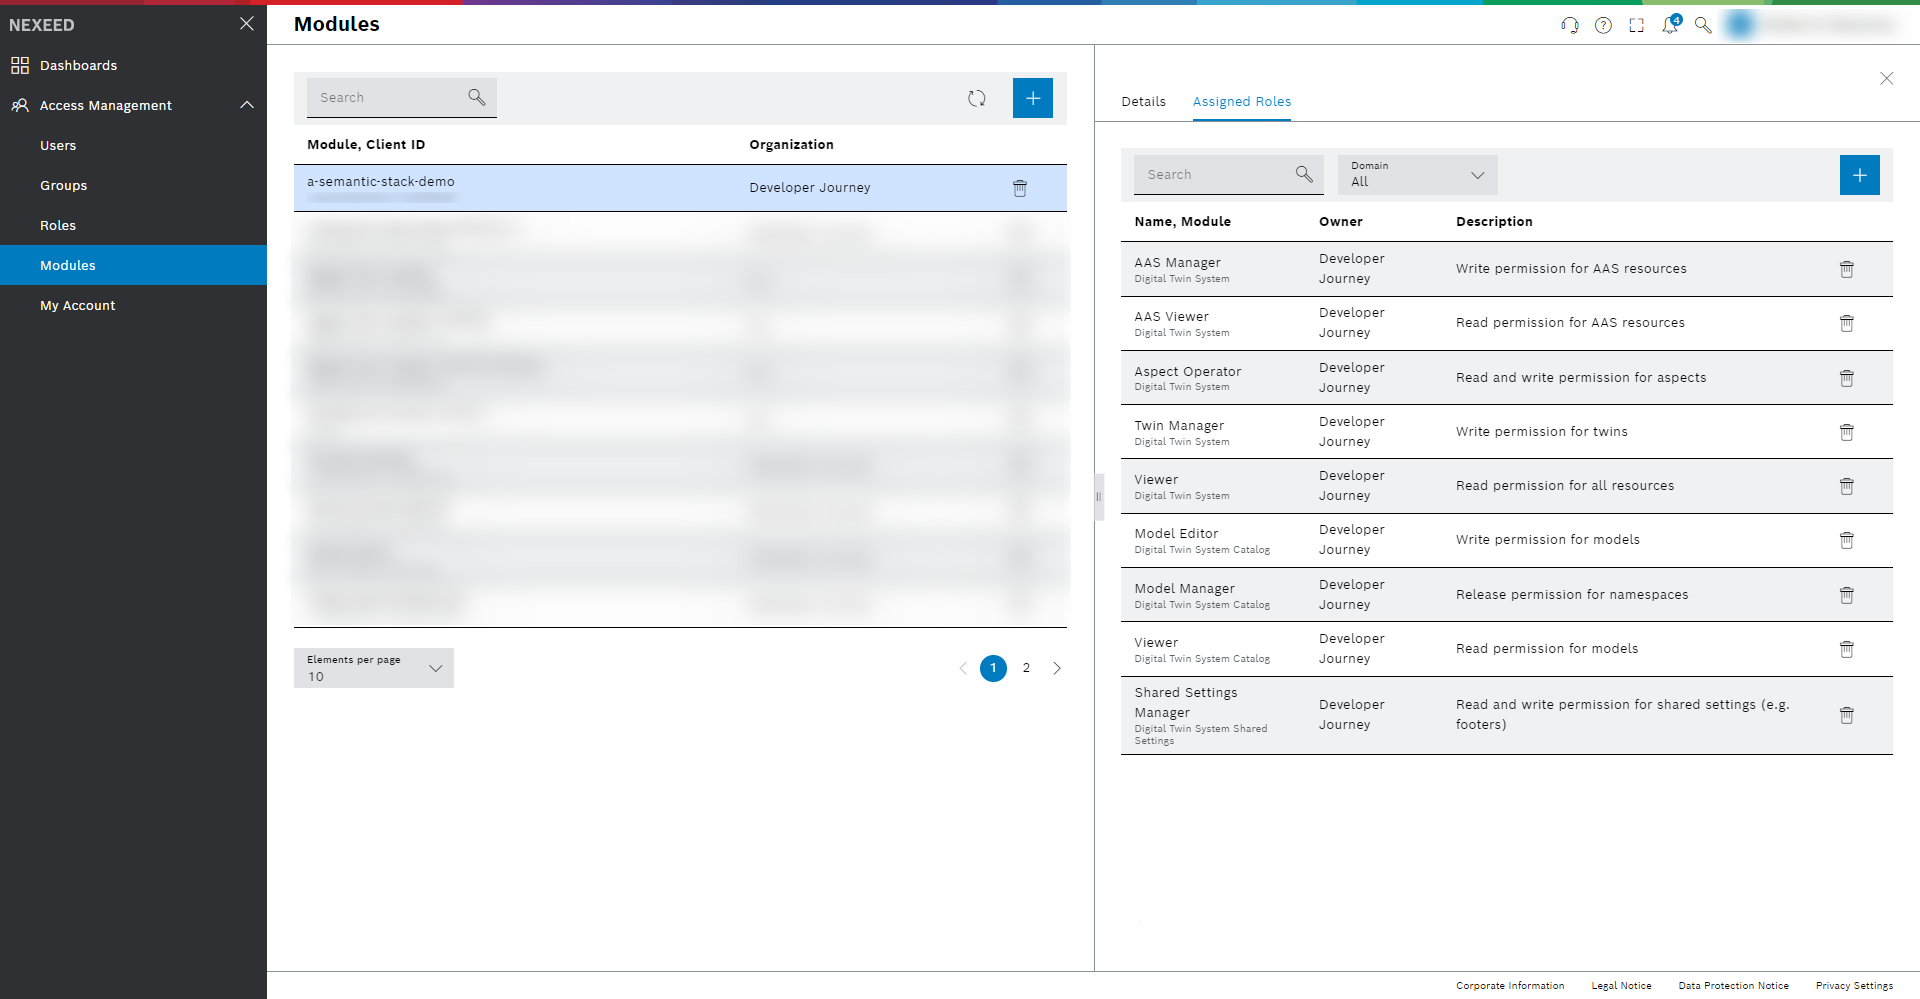
Click the tab Assigned Roles.
By default, the tab is empty; no roles are assigned yet. -
Click the Assign Role button
 .
.
The Select Role dialog opens. -
Select the roles available for the following domains:
-
Digital Twin System
-
Digital Twin System Catalog
-
Digital Twin System Shared Settings
-
-
Confirm with Assign.
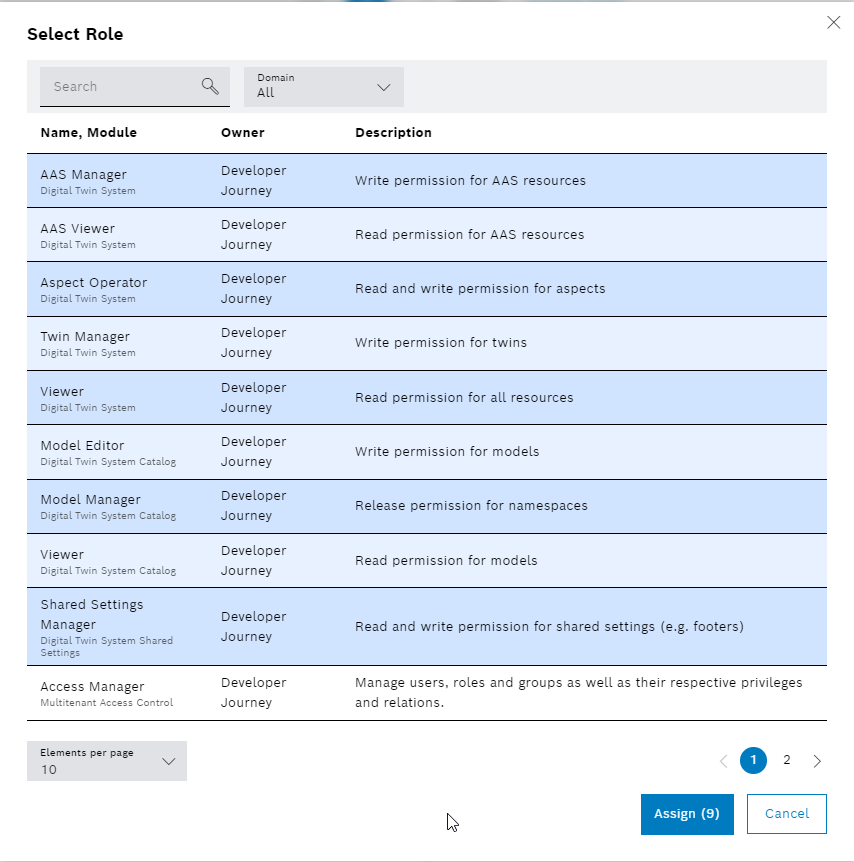
Your client now has the required roles to request the Digital Twin Registry and the Aspect Model Catalog on your tenant.
You are now ready to Explore digital twins.