Create a new Aspect Model
Facilitate the power of semantics by turning your domain knowledge into a formal model.
The model is understood by Bosch Semantic Stack and allows to reuse the knowledge for various solutions.
To receive data from specific assets (e.g., devices, vehicles) aspects are needed. Each aspect describes a specific property of a specific asset. These properties need to be structured in an Aspect Model. With the following example, you will learn how to create a new Aspect Model.

Description
You have received the task to prepare an Aspect Model, to collect data measured by the vibration sensors of an asset. The requested Aspect Model needs to contain the following elements:
-
One property
-
One characteristic
-
One unit
Modeling
Start the Aspect Model Editor.
-
Create a new model by clicking the + icon, Create/Upload Aspect Model.
-
From the Models choose Default Aspect Model.
-
Confirm with Start modeling.
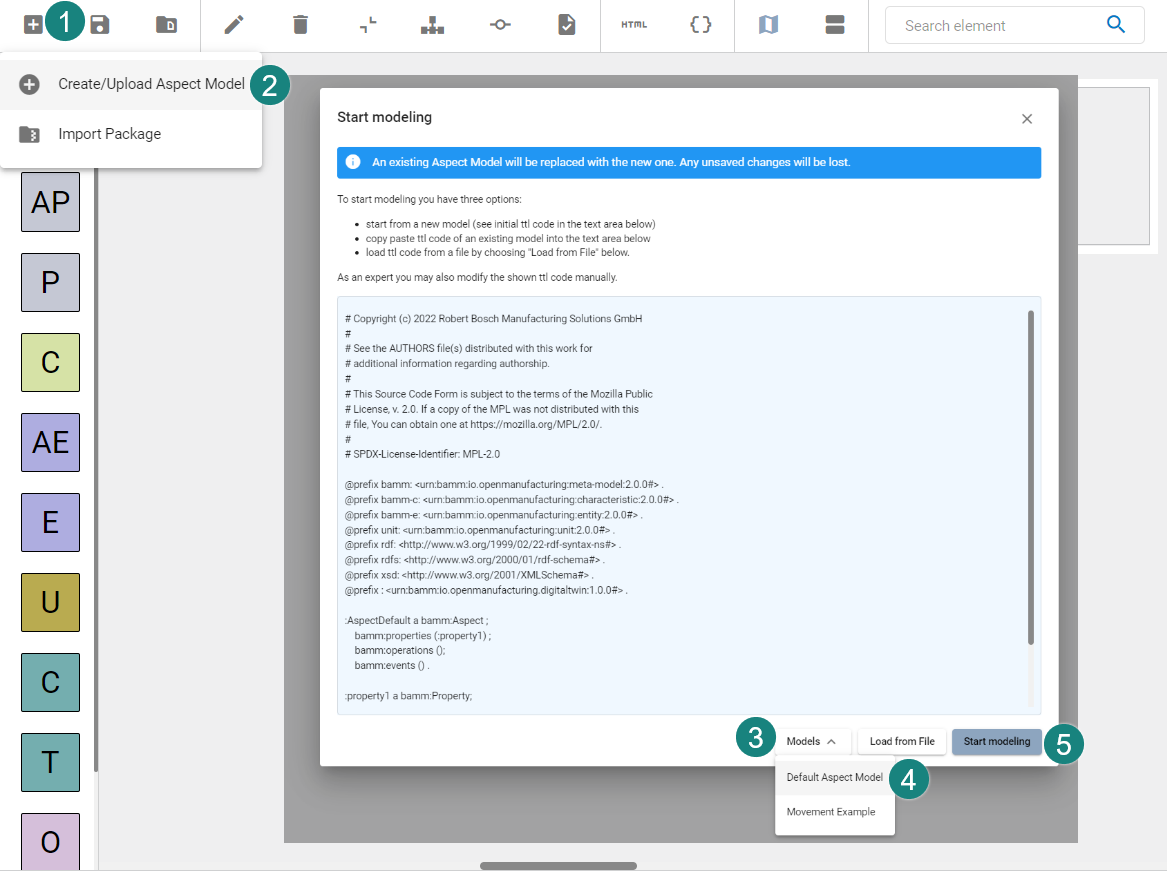
→ A new, predefined Aspect Model will open.
Whenever you create a new model be aware that it will be of namespace org.eclipse.examples by default.
|
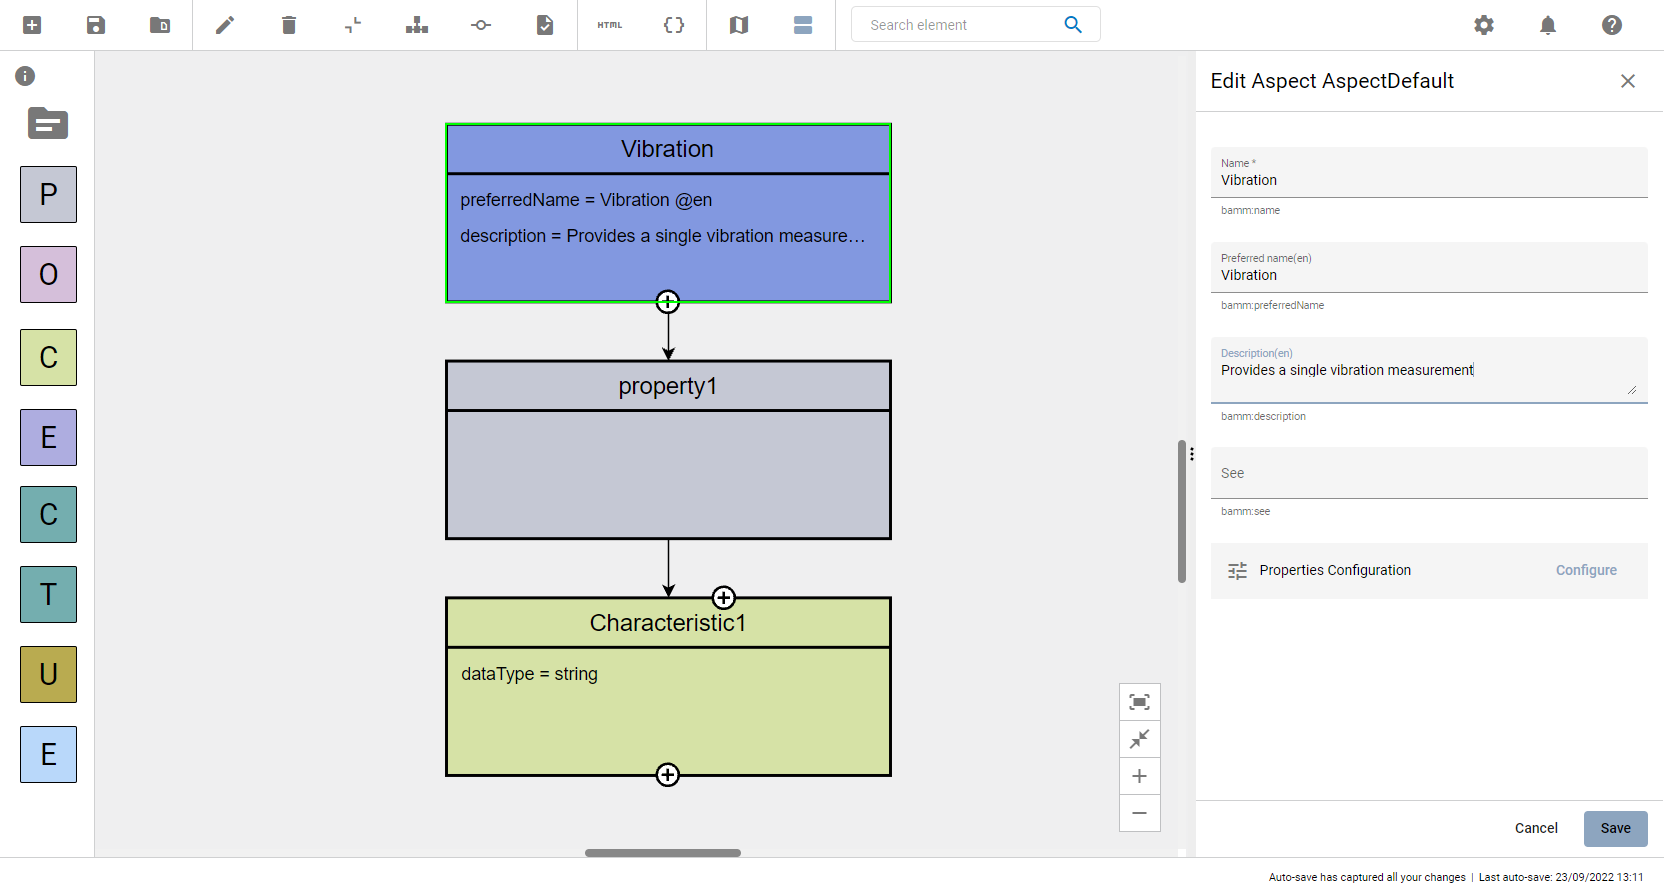
Create the aspect name
-
Double-click the AspectDefault element.
-
Add the following information in the fields on the right:
-
Name:
Vibration -
Preferred name(en):
Vibration -
Description(en):
Provides a single vibration measurement
-
-
Confirm your changes with Save.
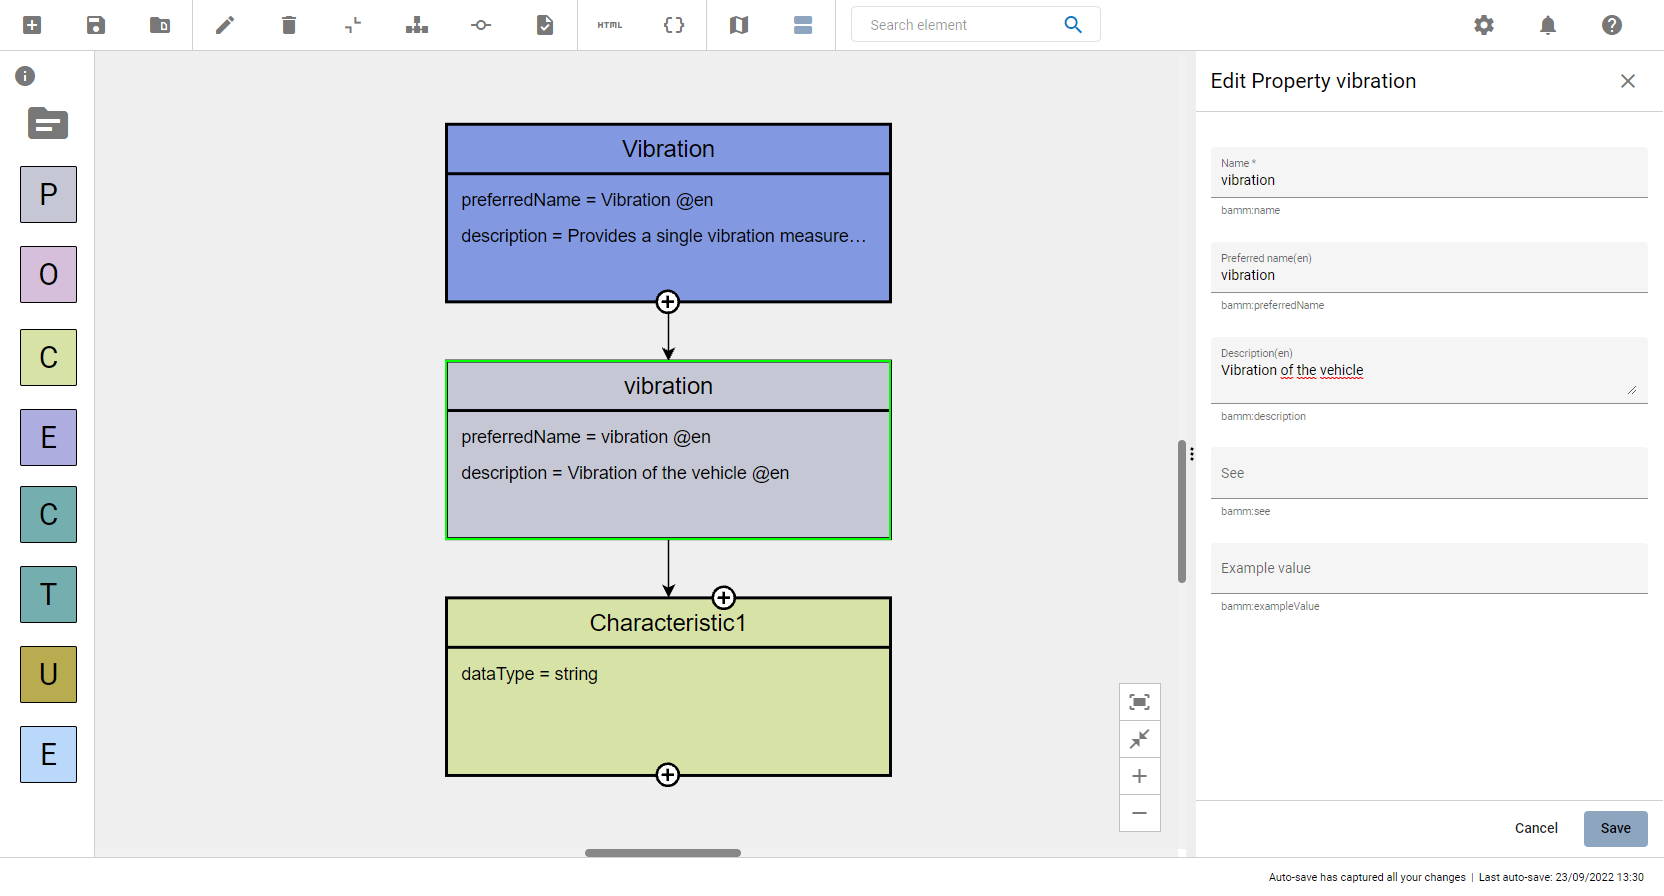
Set the property
-
Double-click the property1.
-
Add the following information to the property1:
-
Name:
vibration -
Preferred name(en):
vibration -
Description(en):
Vibration of the vehicle
-
-
Confirm your changes with Save.
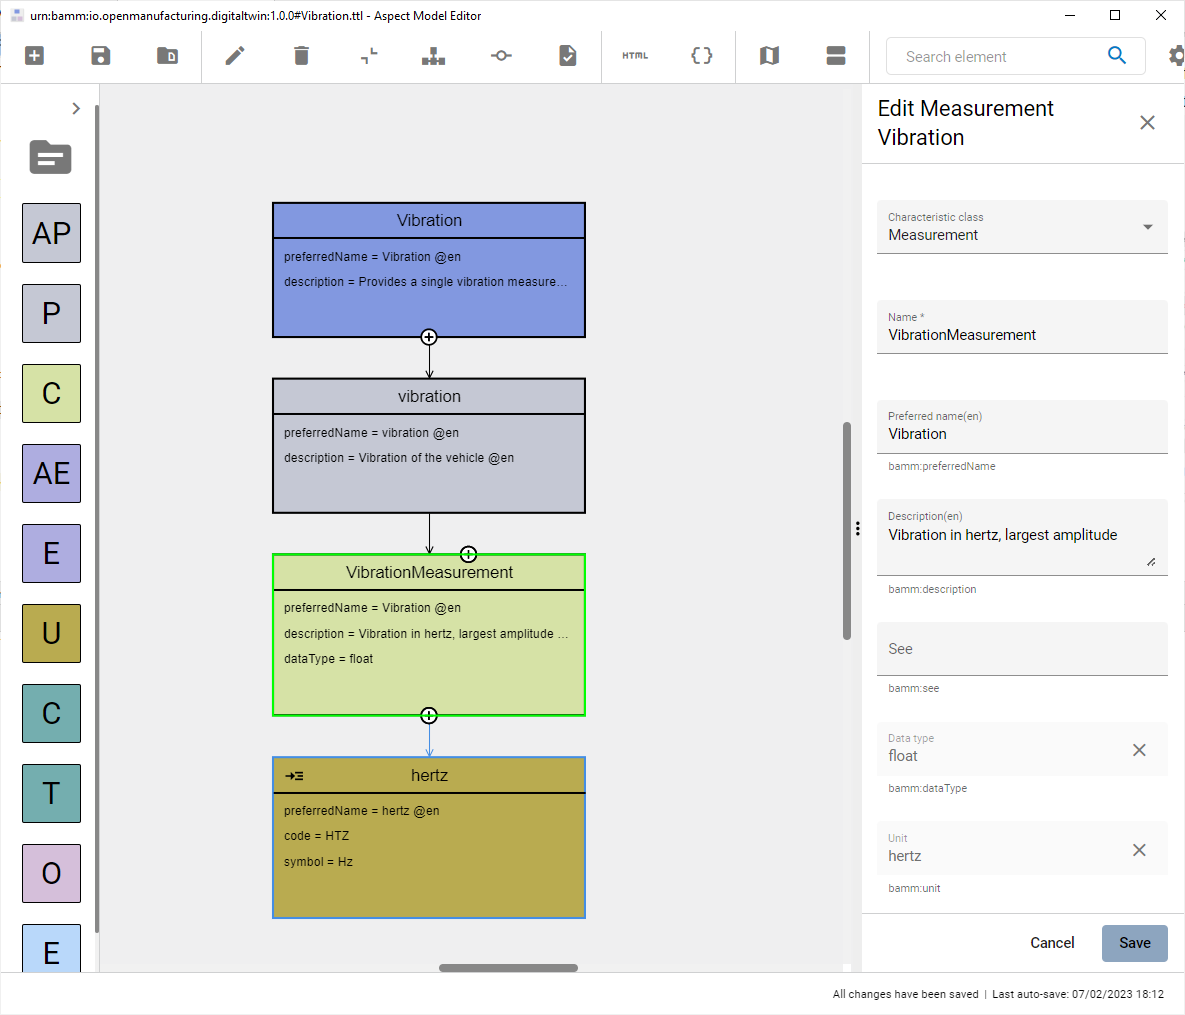
Define the characteristics
-
Double-click the Characteristic1.
-
Add the following information to the Characteristic1:
-
Characteristics class: Choose
Measurementfrom the drop-down menu -
Name:
VibrationMeasurement -
Preferred name(en):
Vibration -
Description(en):
Vibration in hertz, largest amplitude -
Data type: Remove
stringwith the x and choosefloatfrom the drop-down menu -
Unit: Choose
hertzfrom the drop-down menu
-
-
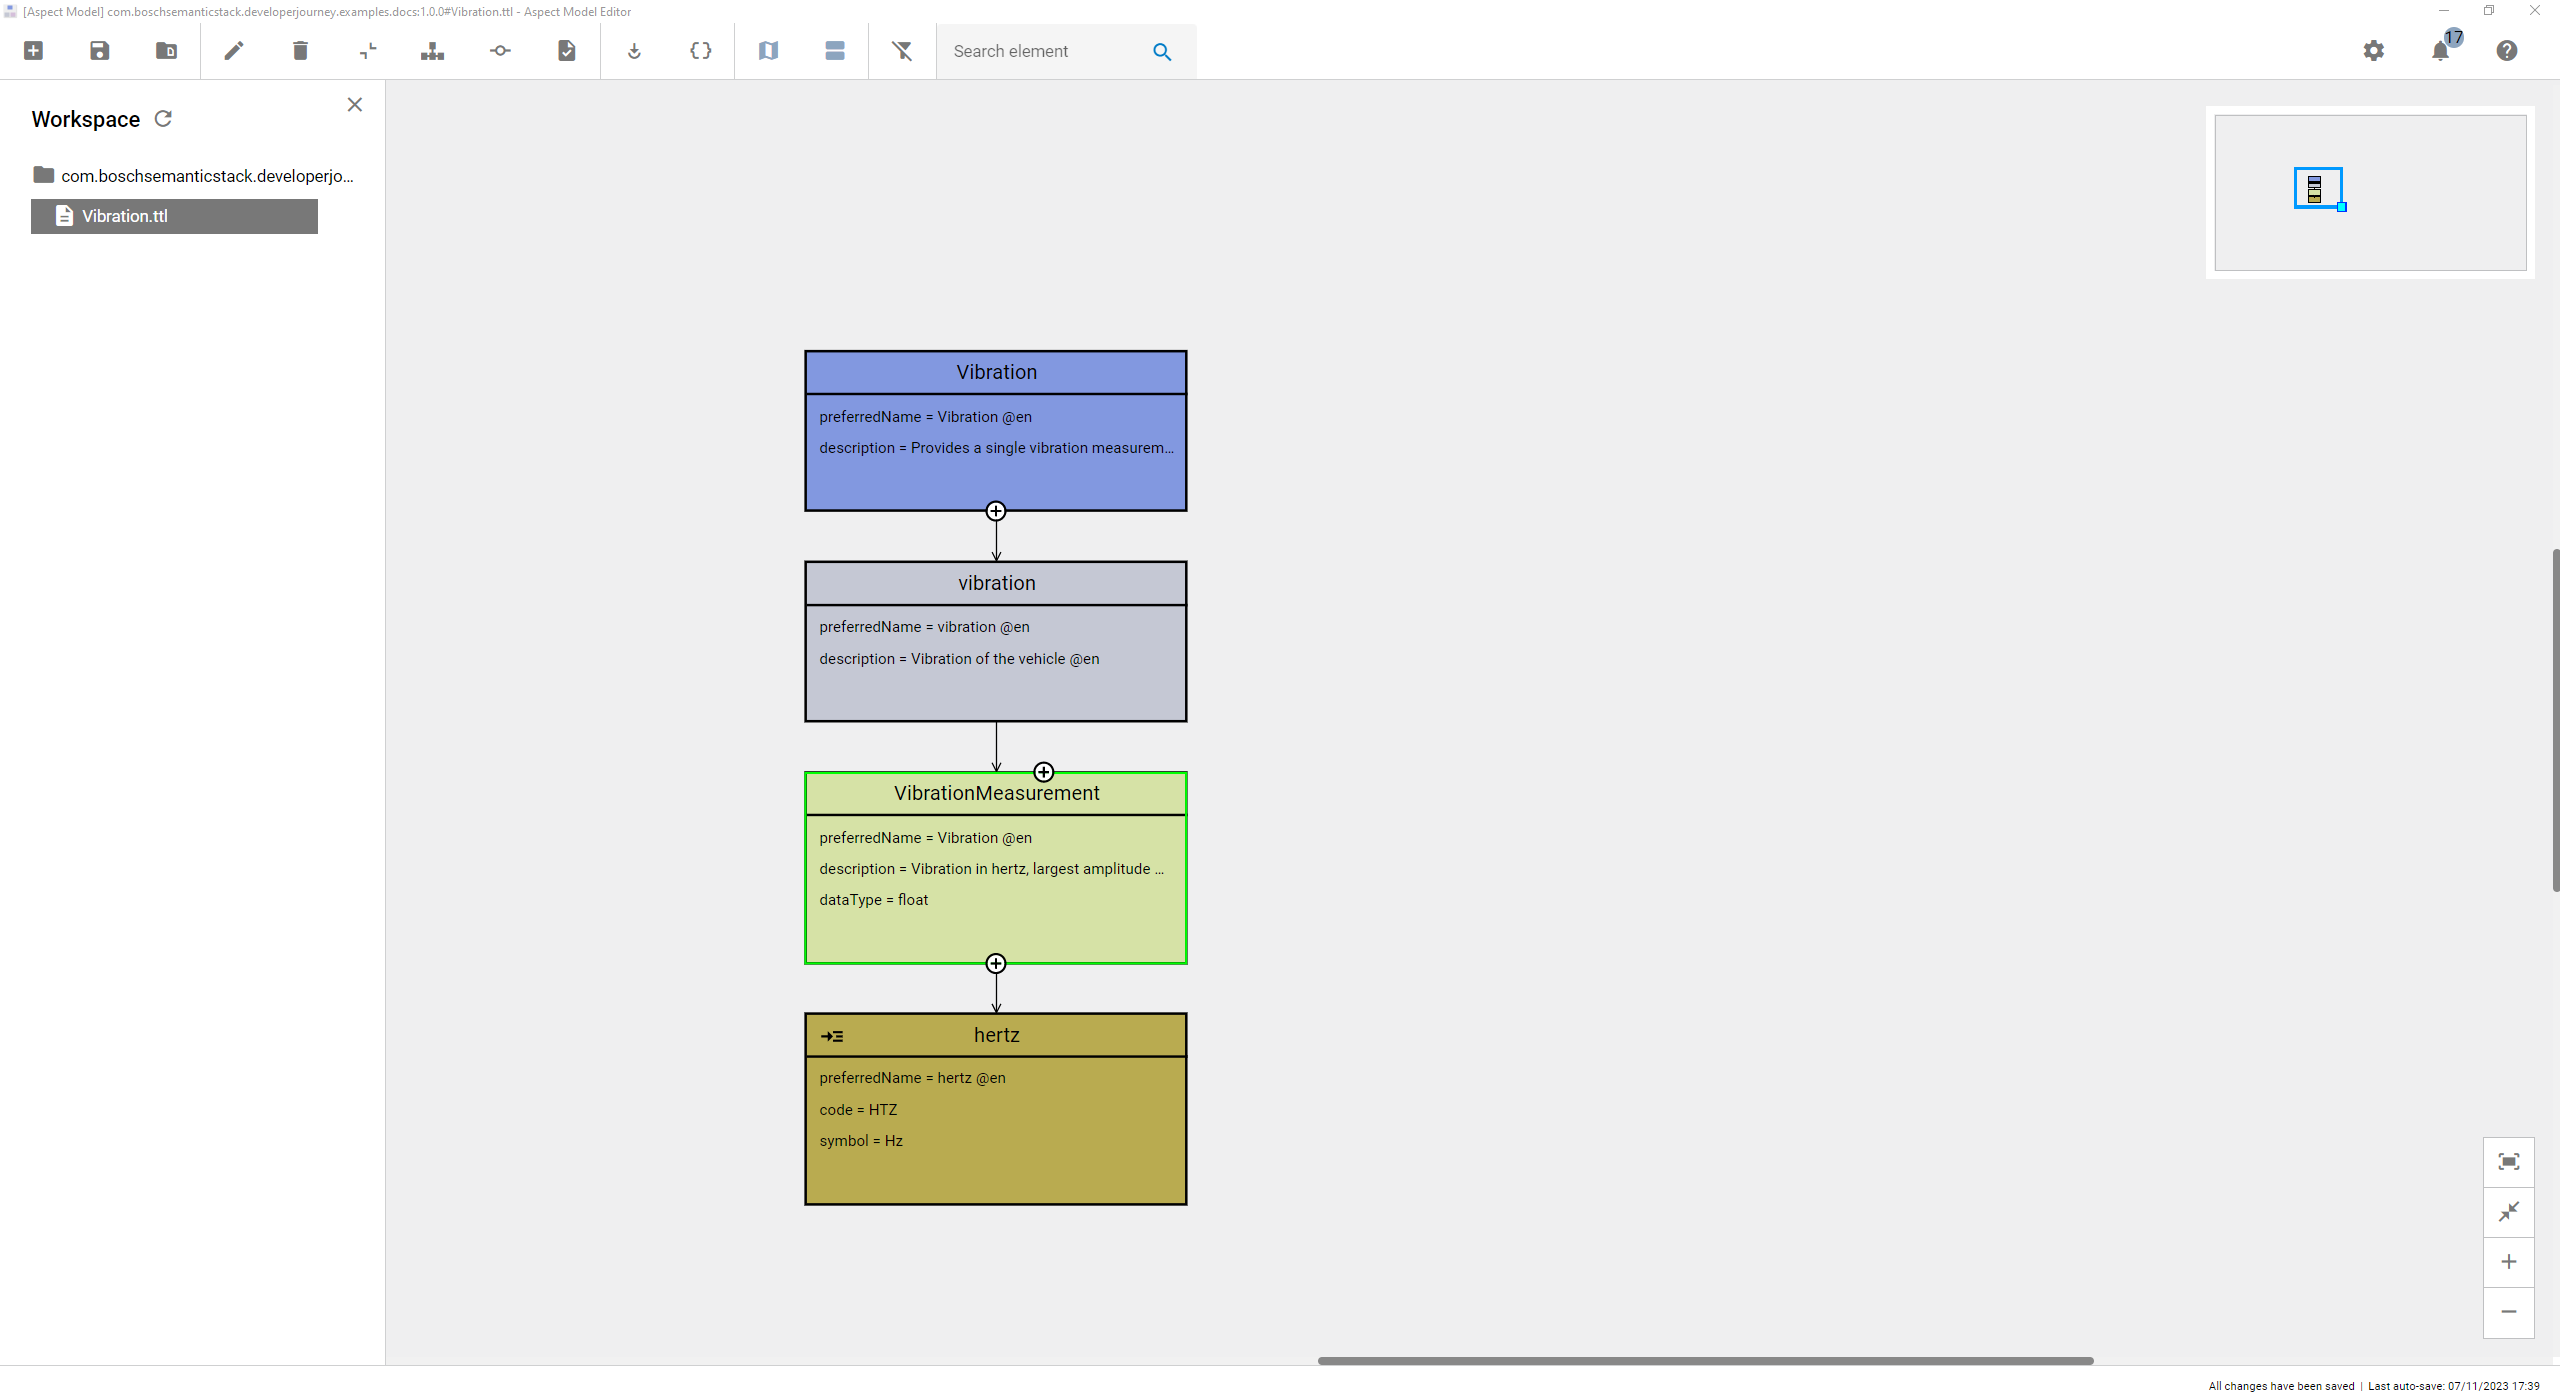
Confirm your changes with Save.
→ A new unit opens automatically with the information added to the Characteristics. -
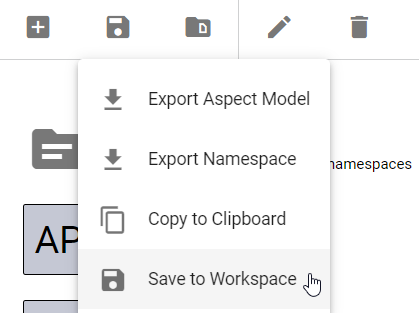
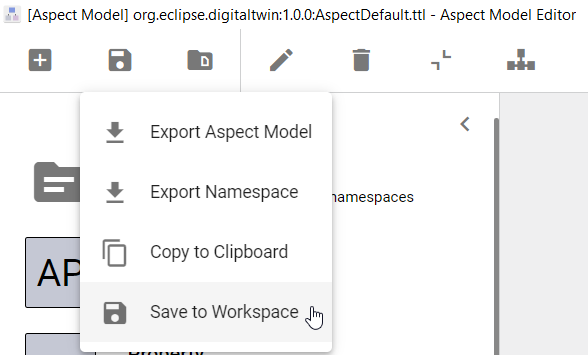
Click Save and select Save to Workspace.
Validation
Once you have inserted all the necessary information into your Aspect Model, the validation function of the Aspect Model Editor confirms the compliance with the Semantic Aspect Meta Model (SAMM) specification.
Set up your namespace
Before you start modeling you set up your namespace. You need to use the same namespace as the whitelisted namespace in the Aspect Model Catalog.
Check namespace in the Aspect Model Catalog
Open the Aspect Model Catalog via
https://workspace.bosch-semantic-stack.com?tenant=<your-tenant-id>
-
Open your profile details.
-
Click Whitelisted namespaces.
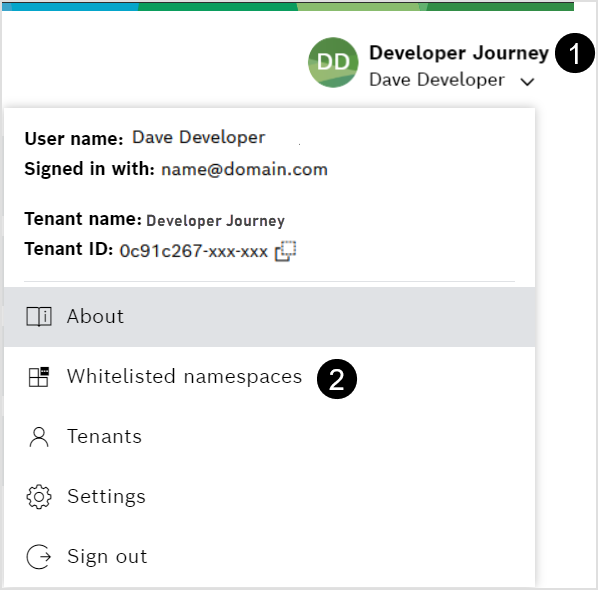
-
Copy the whitelisted namespace for your Aspect Model.
Change namespace in the Aspect Model Editor
For the getting started tutorial we use com.boschsemanticstack.developerjourney.examples.docs as our whitelisted namespace.Your namespace might be something like com.boschsemanticstack.sandbox0XX.
|
Start the Aspect Model Editor.
-
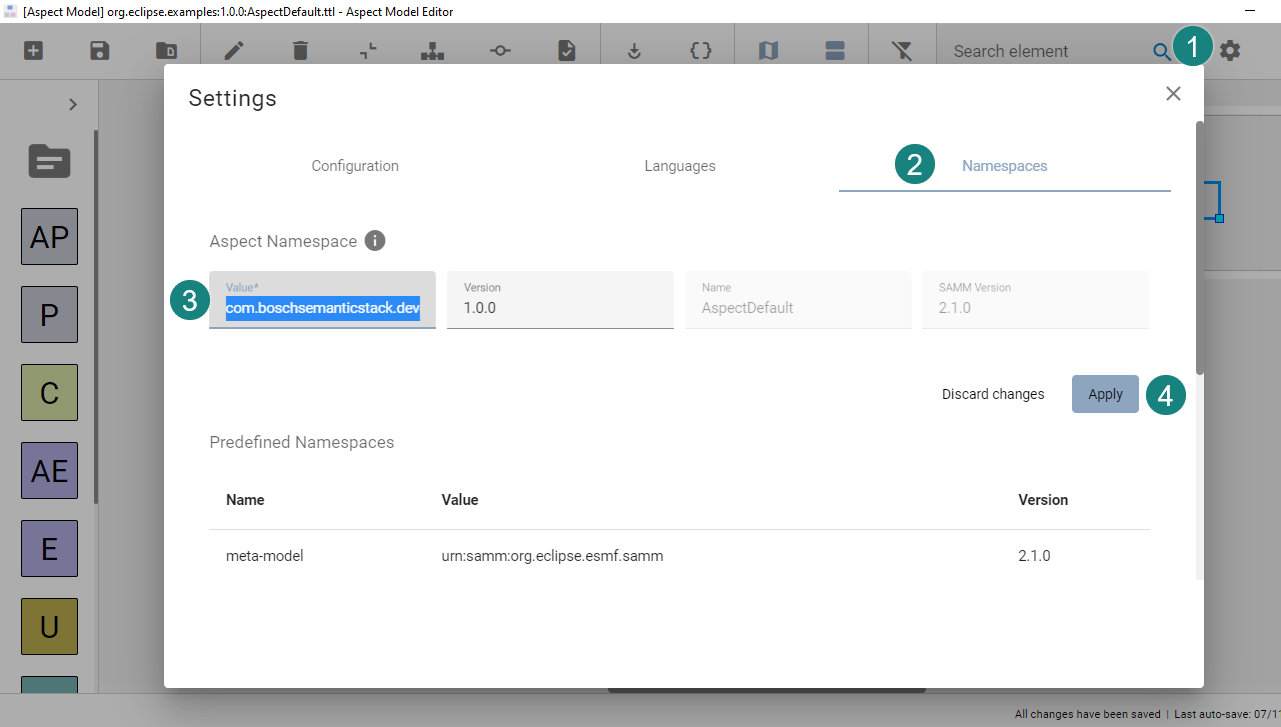
Go to Settings
 to set up the namespace.
 -
Navigate to the Namespaces tab.
-
Enter your namespace.
-
Confirm with Apply.
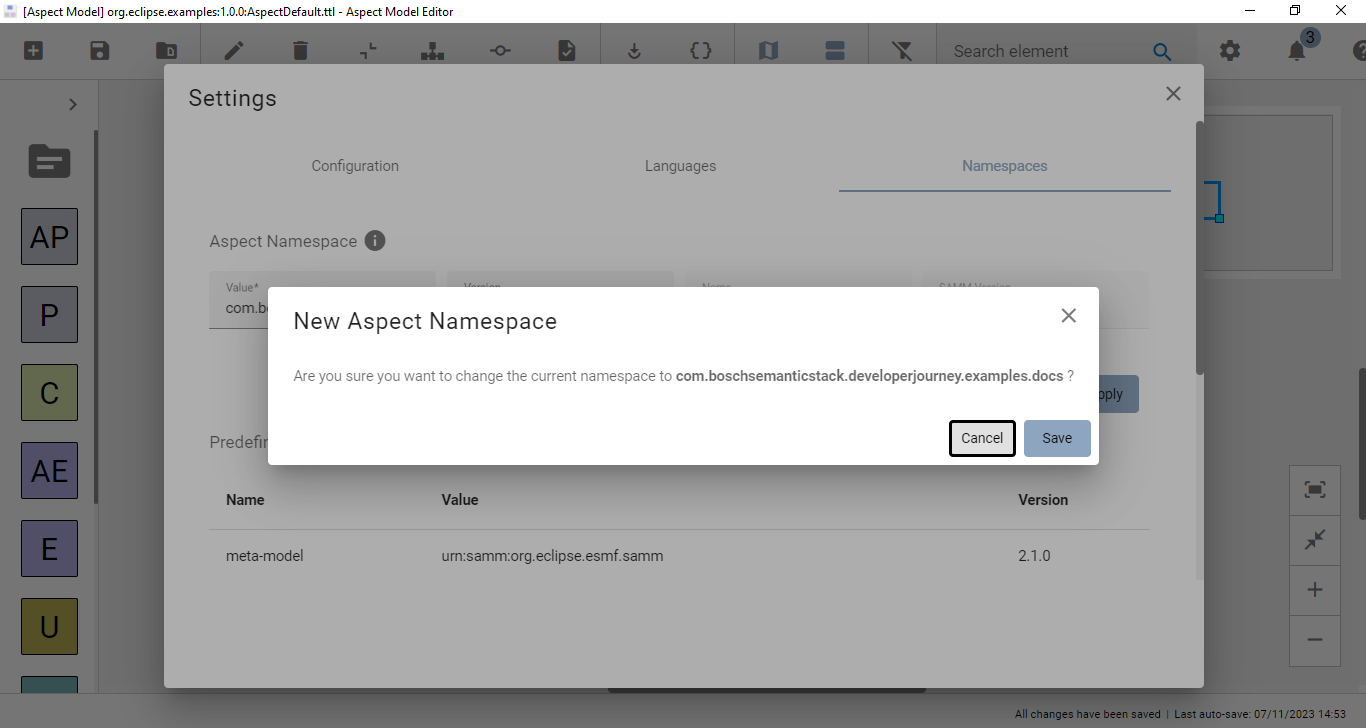
-
Confirm the dialog New Aspect Namespace with Save.
-
Click Save to Workspace.
-
Confirm dialog with Continue.
→ Your namespace will be displayed in the workspace.
Export namespace
To upload and publish the created Aspect Model into the Aspect Model Catalog, you need to export the namespace.
-
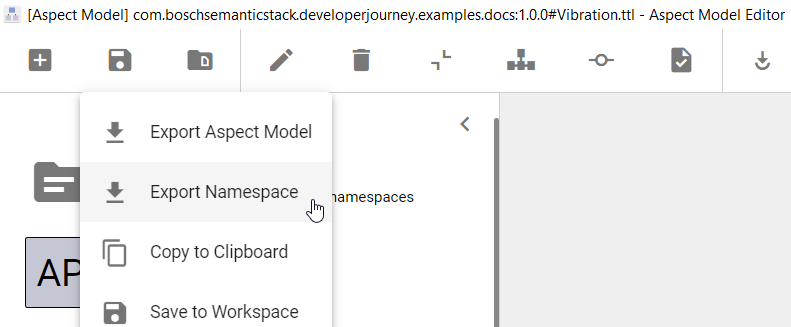
Click Save and choose Export Namespace.
-
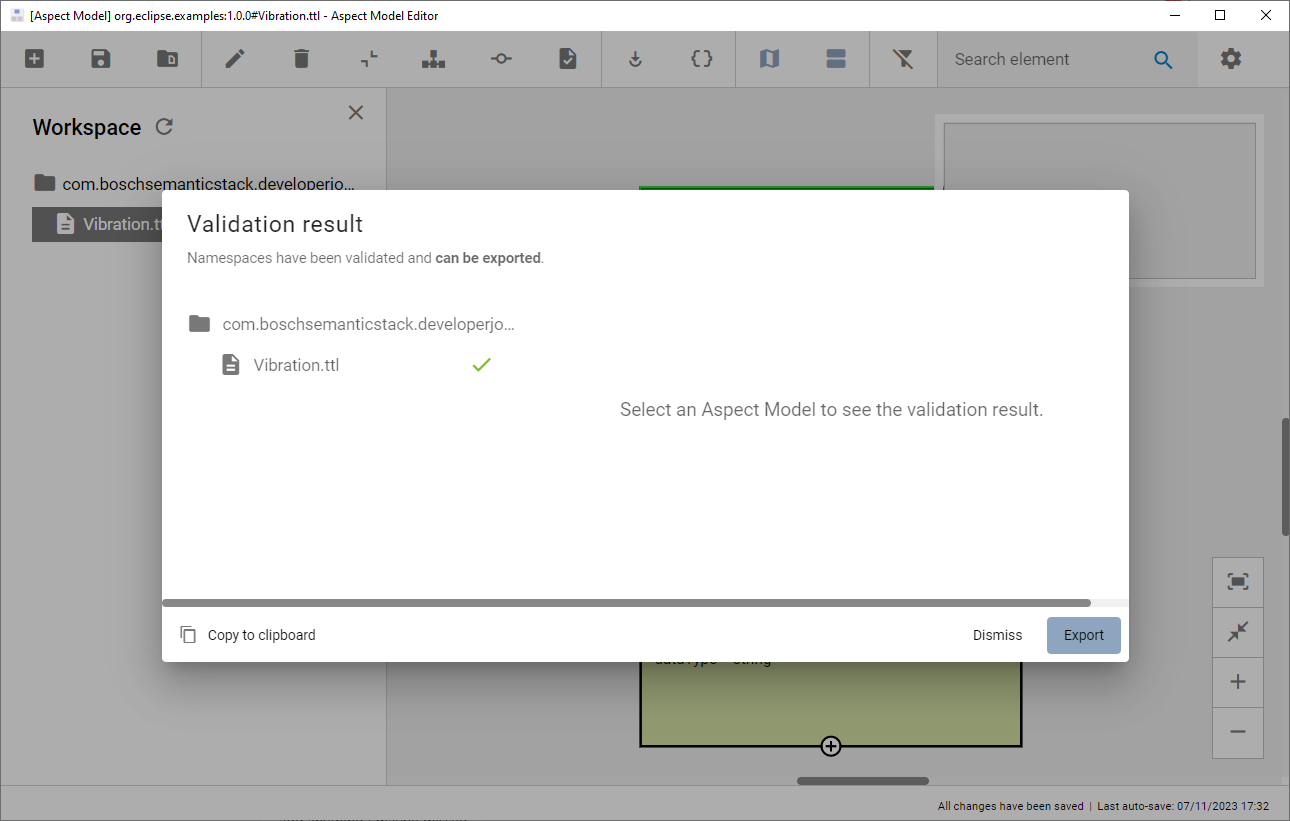
Select the available namespace and confirm with Next.
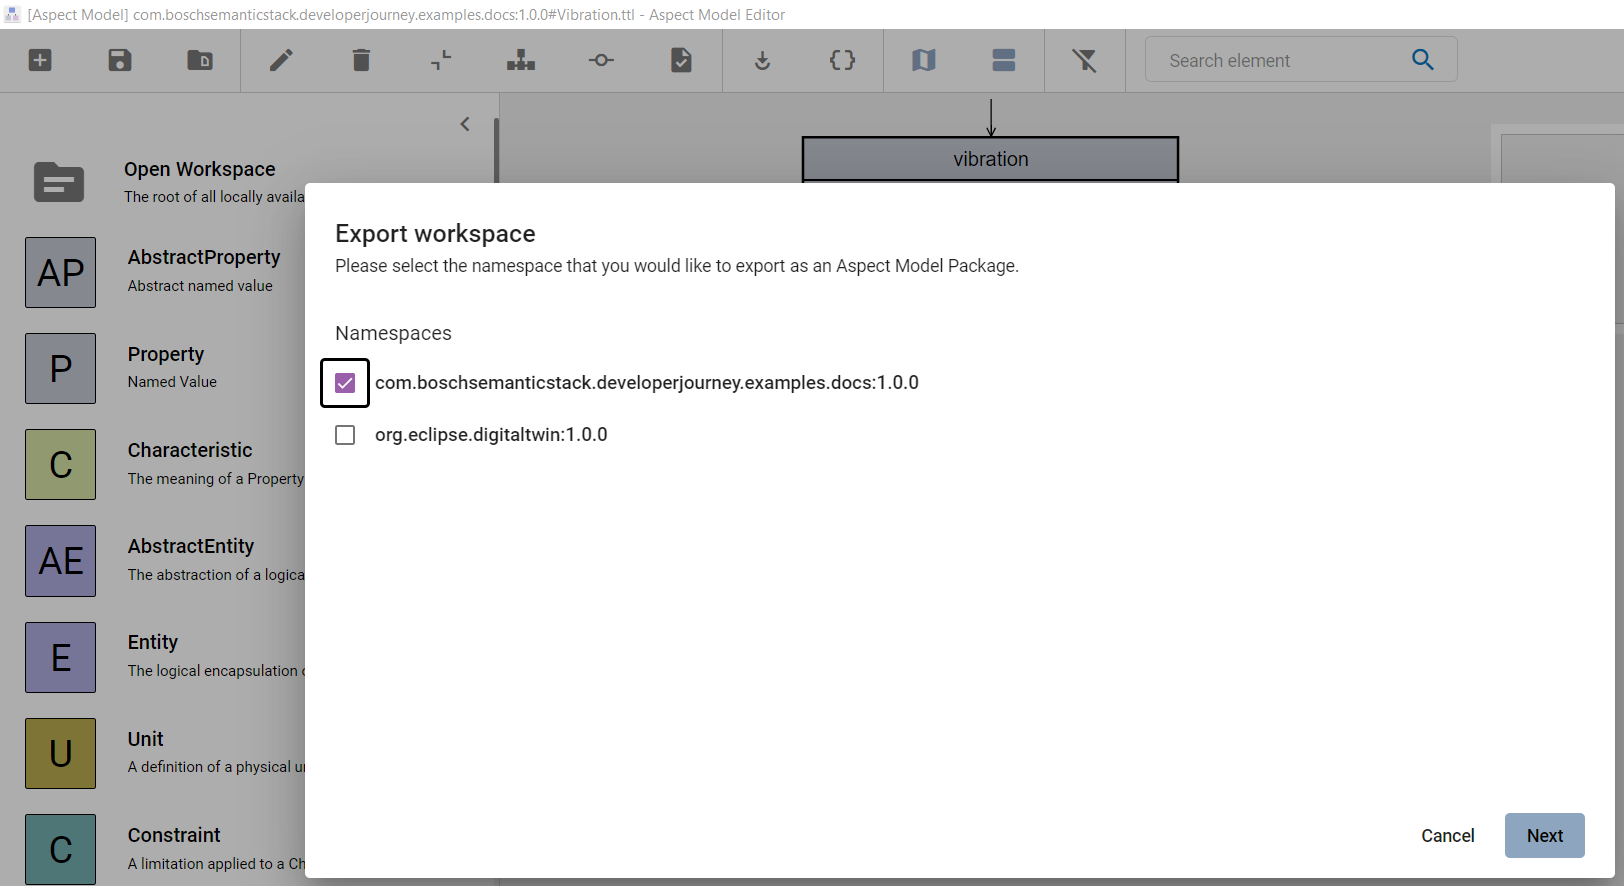 → After validation is done, a summary dialog will be displayed. If the validation has files with errors, the namespace cannot be exported.
 -
Click Export.
-
Save the ZIP file in your local file directory.